Assigned Actions
The Assigned Actions widget allows the management and execution of standalone workflows on existing infrastructure. This widget is available for Deployments, Resource Groups, and Compute Nodes.
Actions are based on underlying Action Templates, which define the specific operations (such as running maintenance scripts or rotating credentials) that can be executed against a target object. Before an action can be executed, it must first be assigned to the target item.
Widget Overview
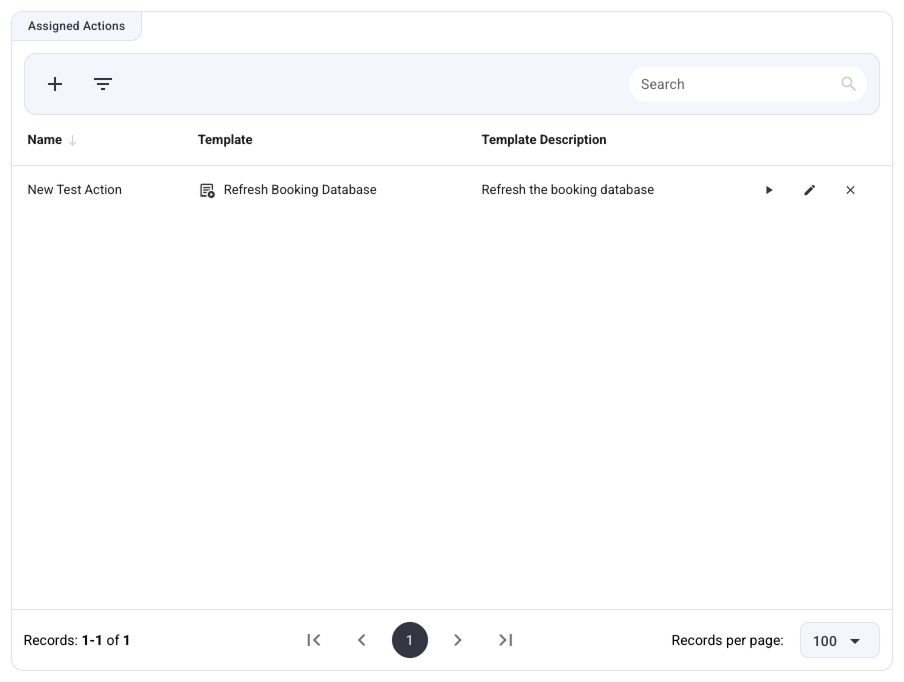
The Assigned Actions widget provides a table-based interface to view and manage all actions currently assigned to an item.
Searching and Filtering
The top action bar provides tools to find specific assignments:
- Search Input: Located on the top right, this temporarily filters the table rows by the action's Name. This filter clears when navigating away or reloading the page.
- Persistent Filters: Click the Filter icon to open the advanced filters menu. Filtering by name here creates a persistent filter chip next to the filter button. This filter persists across page reloads and navigating to other items. Click the
Xon the chip to remove it.
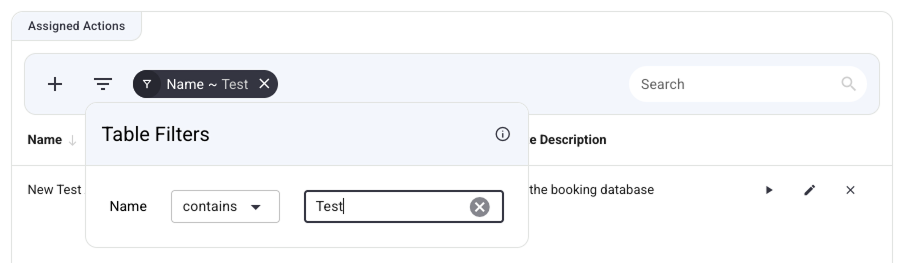
Table Columns
- Name: The user-defined name of the action assignment.
- Template: The name of the underlying Action Template this assignment is based on.
- Template Description: The description inherited from the underlying template.
- Actions (Right Column): Quick actions to Execute (play), Edit (pencil), or Unassign (X) the action.
Assigning an Action
To assign a new action to an item, either click the Add (+) button in the widget's top action bar, or click the Assign Action button in the item's top operations bar.
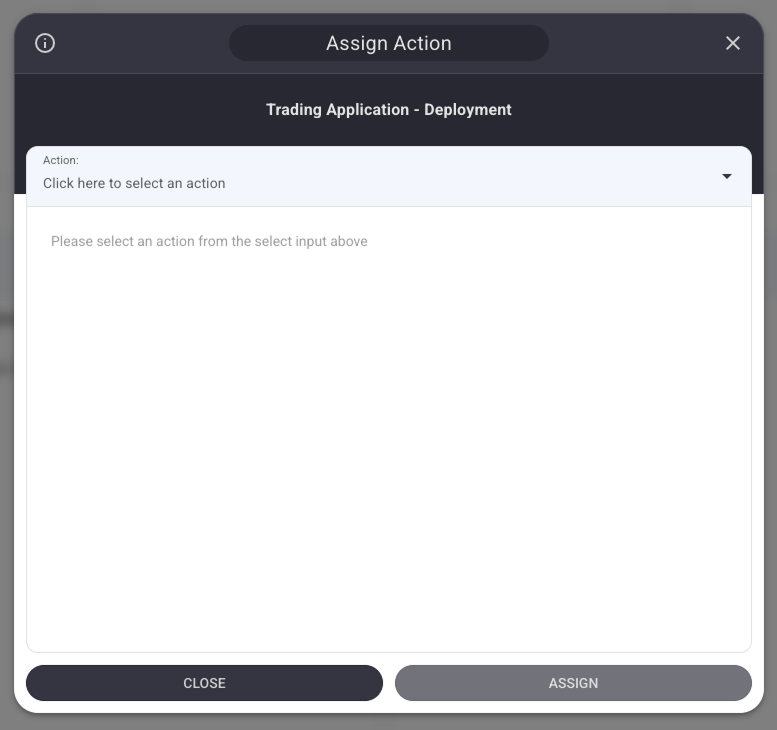
- Select an Action: Use the dropdown at the top to select from available Action Templates valid for the current scope (e.g., templates with
scope: deployment). - Name: Provide a custom, user-defined name for this assignment. This is mandatory.
- Parameters: If the action template defines user inputs, they will appear here. While some parameters may indicate they are "Required," they may be left empty during the assignment phase. These parameters only become strictly required once an action is executed or scheduled.
- Enable Schedule (Optional): Checking this box reveals a Cron input field to automate the action.
- Note: If a schedule is enabled, all required parameters immediately become strictly required within this dialog, as the system needs them to run the automated job.
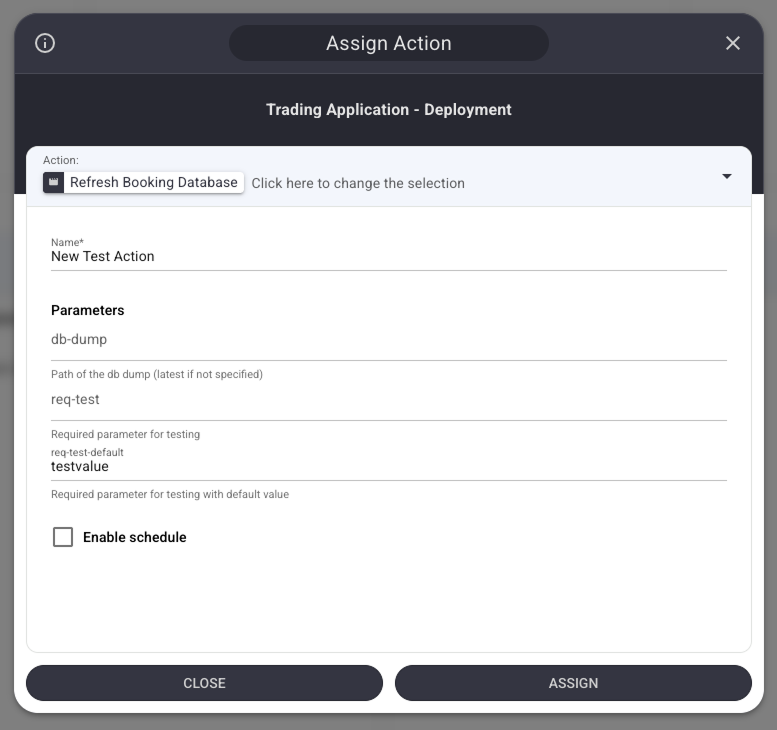
Click Assign to complete the setup. The action will now appear as a new row in the Assigned Actions widget.
Managing and Executing Actions
Each assigned action row features three specific operations on the far right.
Execute (Play Icon)
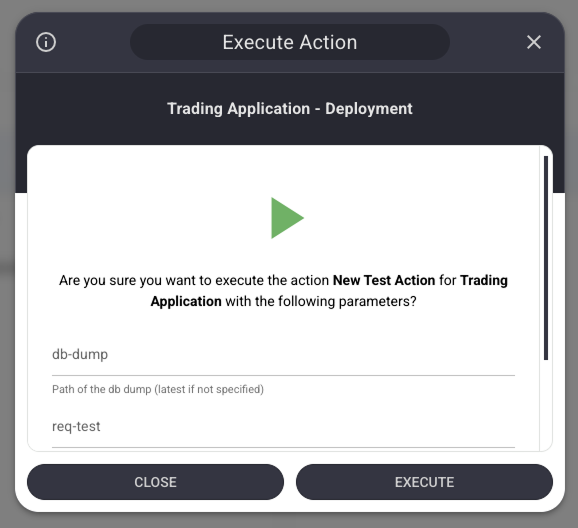
Clicking the execute icon opens the Execution dialog.
- Confirm the execution after reviewing the parameters.
- Mandatory Parameters: Before execution can proceed, all required parameters must be filled out. If any are missing, the input will highlight with an error message.
- Upon successful execution, the dialog closes, and the view automatically scrolls down to the Jobs widget, where a new row will appear, which allows tracking the progress of the action.
Edit (Pencil Icon)
The edit dialog mirrors the Assign Action dialog. It allows updating the user-defined name, pre-filling parameters (to save time during future manual executions), or enabling/modifying an automated schedule.
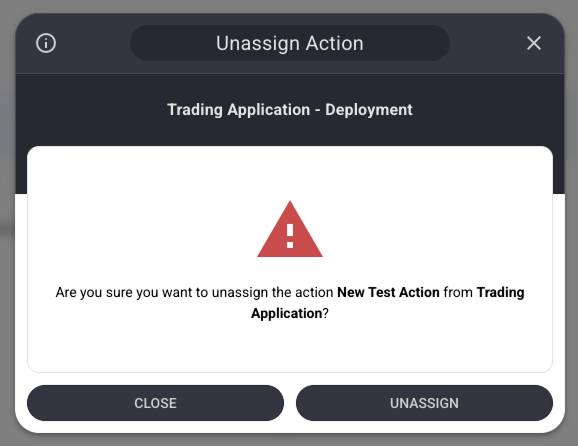
Unassign (X Icon)
Clicking the X icon prompts a confirmation dialog. Confirming will permanently remove the action assignment from the item.
Viewing Action Details (Splitter Pane)
View in-depth details about an assignment or its underlying template using the right-side splitter pane.
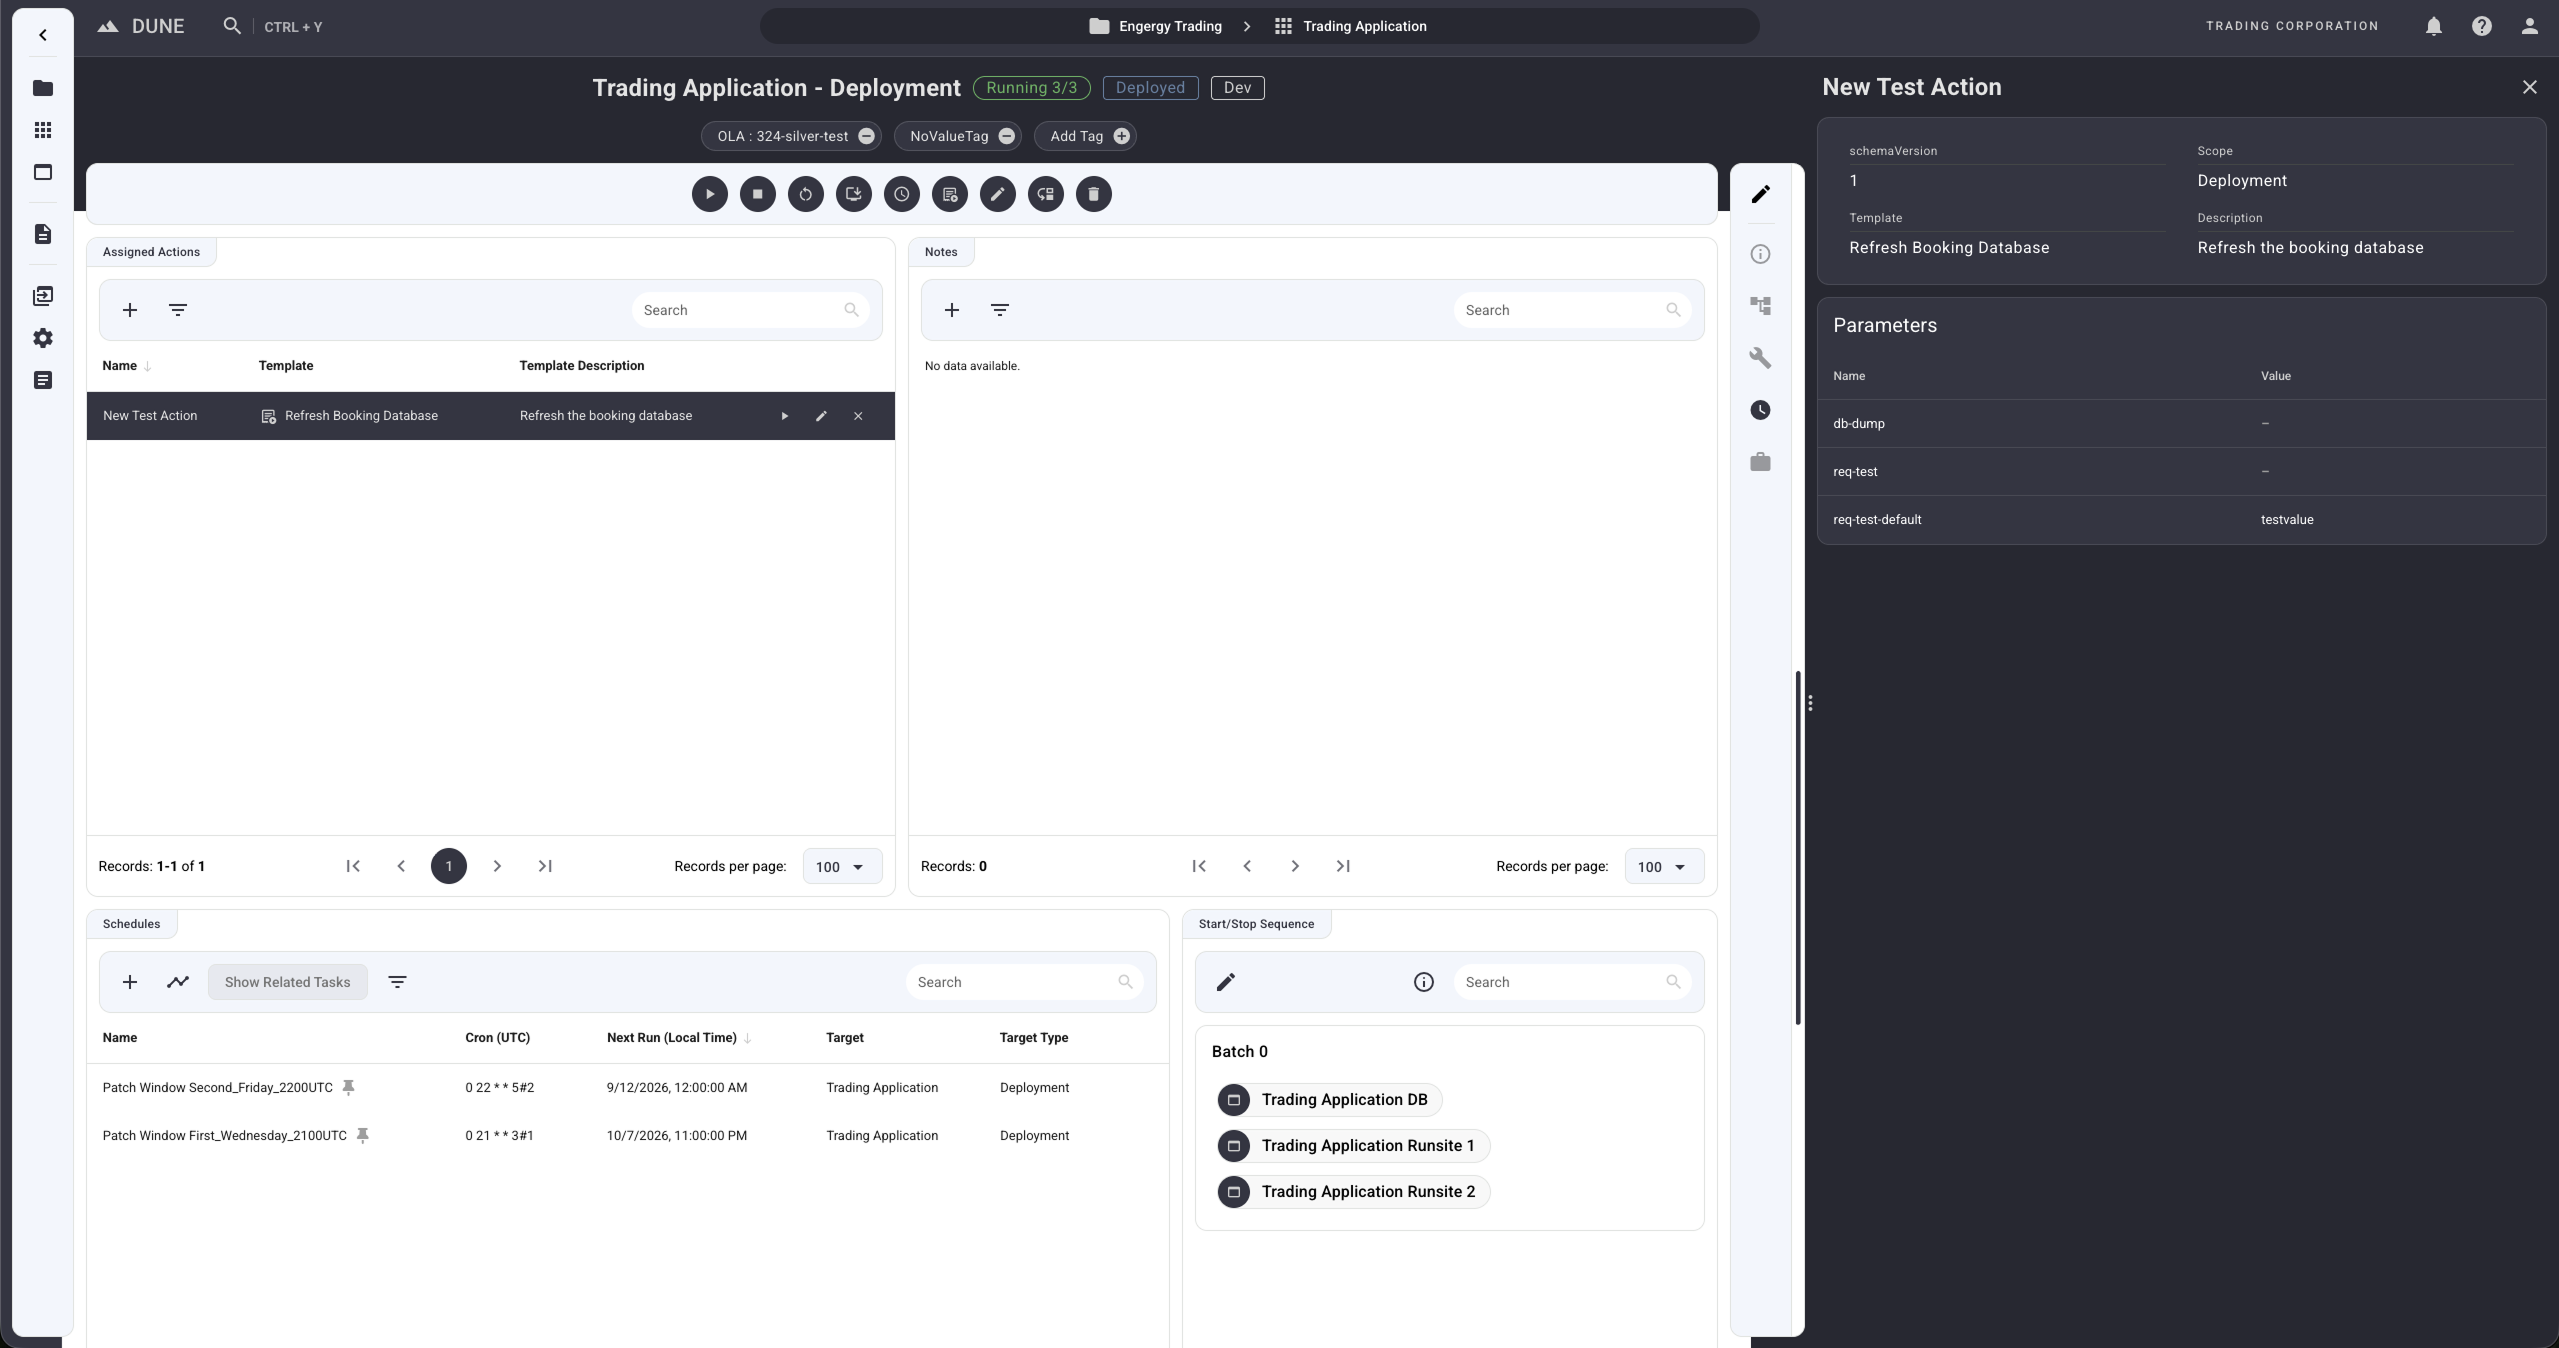
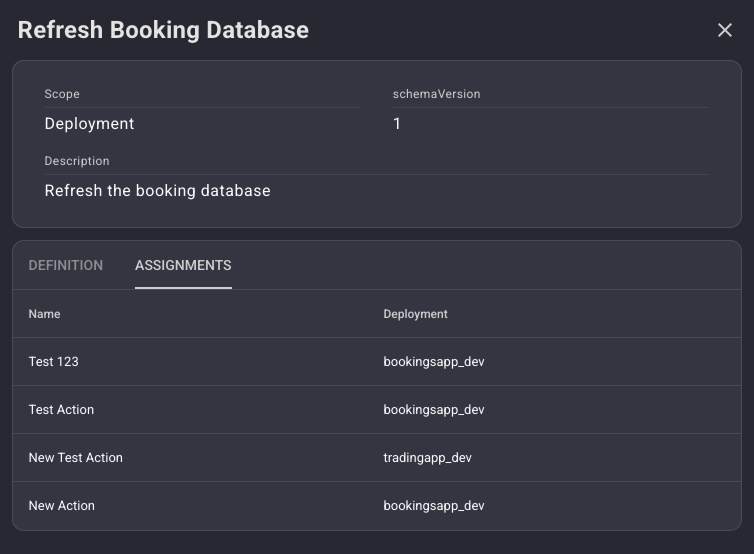
- Viewing Assignment Details: Click anywhere on a row (except the template name or action buttons) to open the assignment details in the right pane. This displays the specific parameters configured for this exact assignment.
- Viewing Template Details: Click directly on the text in the Template column. This opens the underlying Action Template details.
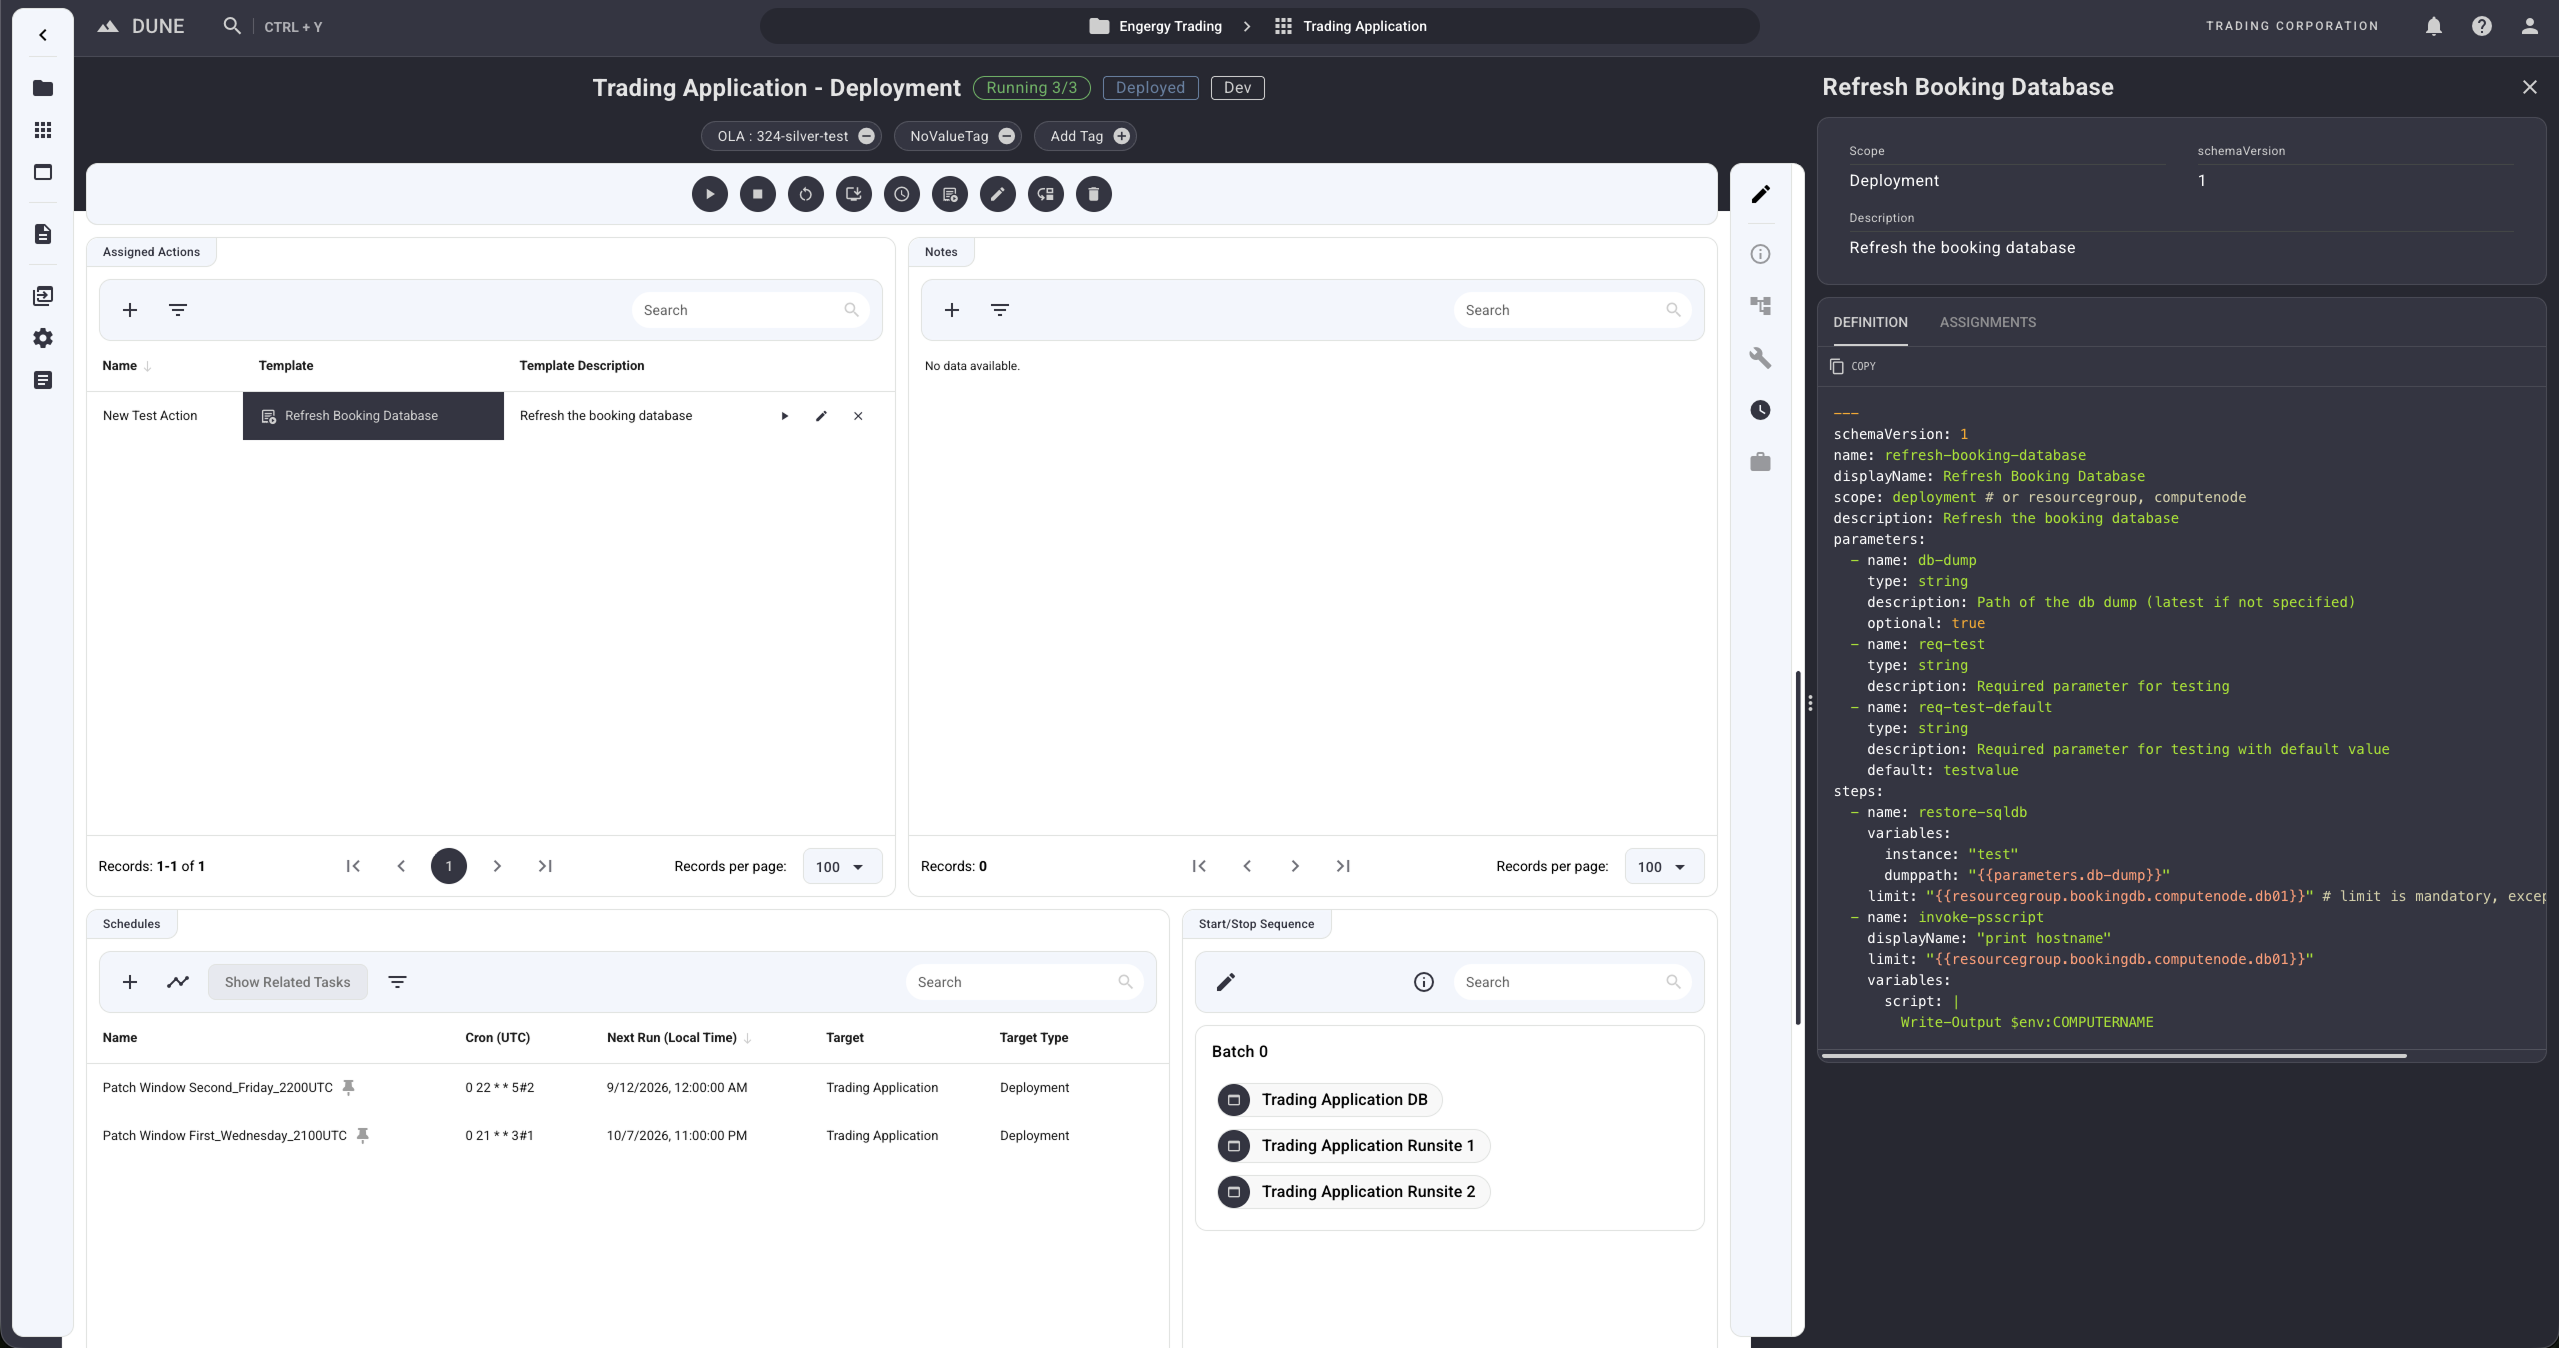
- The Definition tab shows the raw YAML structure of the template.
- The Assignments tab displays a table of all items currently using this template. Click a row in this tab to navigate directly to that specific item.
Pane Controls
Resize the right splitter pane by clicking and dragging the three dots (⋮) on its left edge. To close the pane, click the X in the top right corner, or simply drag the cursor to the right edge of the browser window.
Global Action Templates View
To view all Action Templates available in a tenant, navigate to the global Templates view.
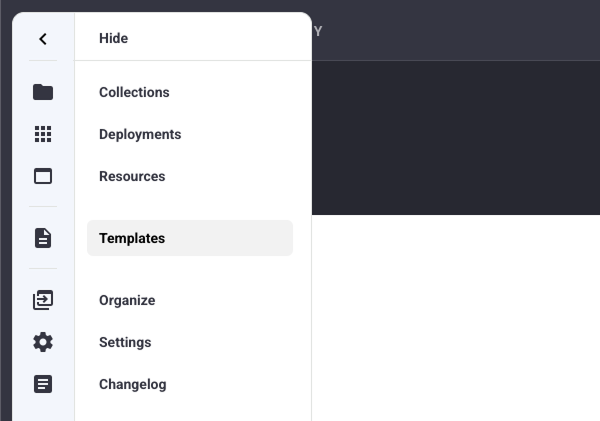
- Open the left navigation drawer and select Templates.
- Navigate to the Action tab.
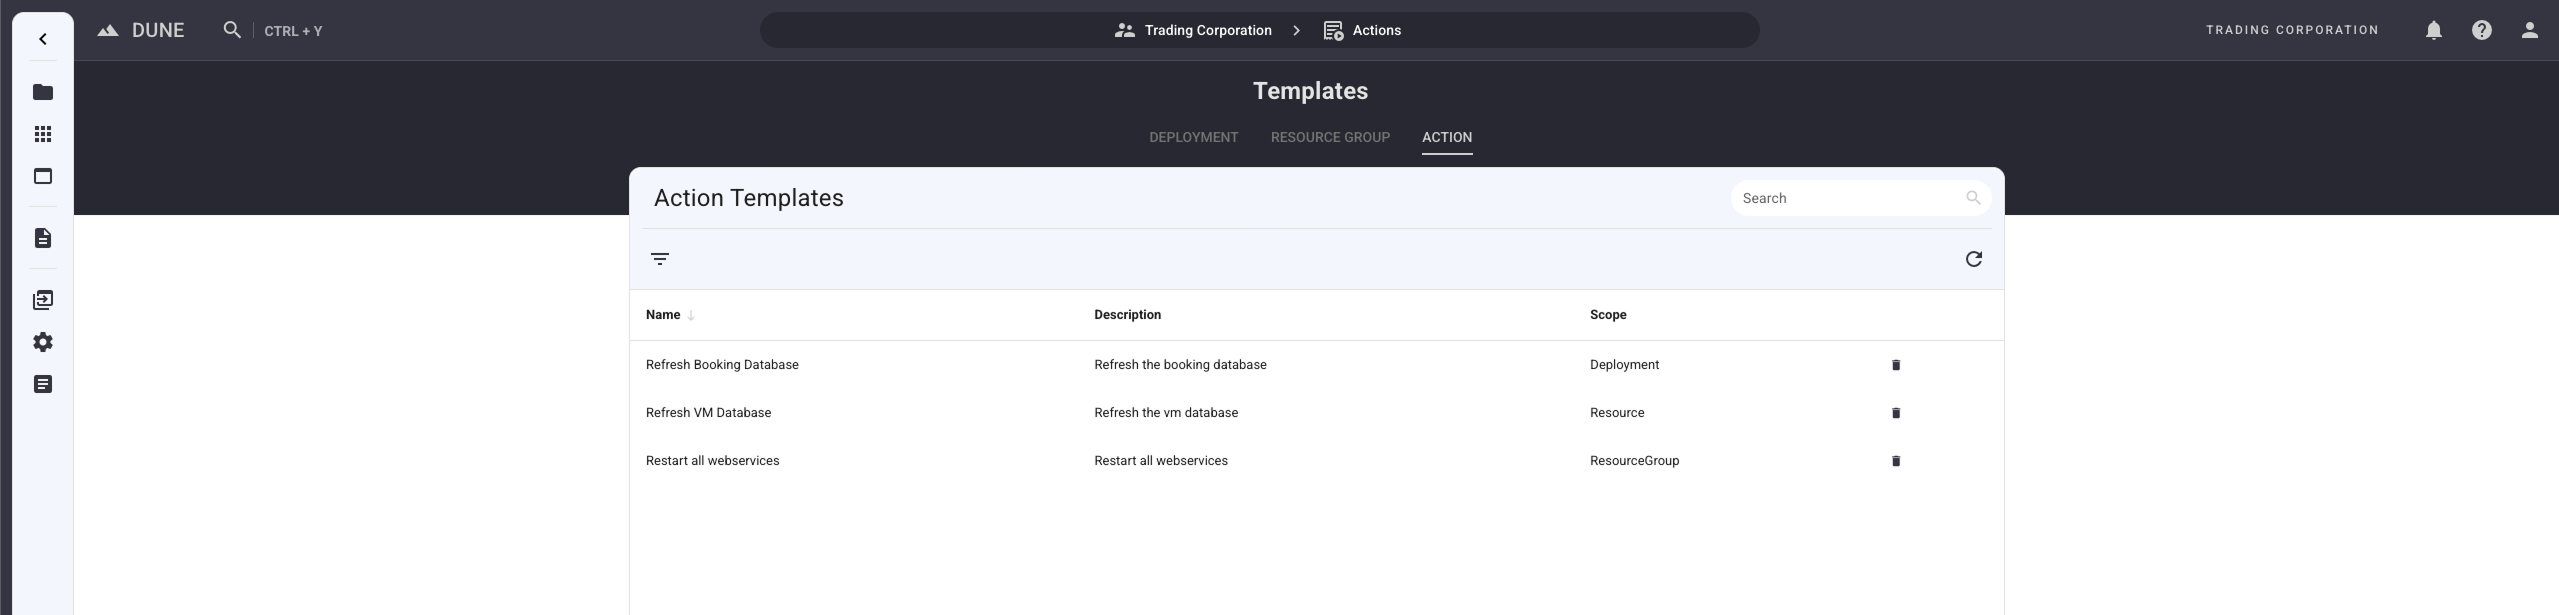
This view displays a table of all available Action Templates. Filter this list by Name, Description, or Scope (Deployment, ResourceGroup, Resource). Clicking on any row will open the right-side splitter pane to view the template's definition and active assignments. From this table, action templates may be permanently deleted using the trash bin icon, provided they are not currently assigned to any items.