Operating Your Deployment
Once you’ve successfully created a deployment, you’ll be redirected to its Deployment View. This page provides all the tools you need to operate, monitor, and manage your deployment.
Summary
The Deployment View makes it possible to:
- Operate and automate your deployment lifecycle
- Manage users and permissions
- Track costs and operations
- Maintain order, visibility, and control
Deployment View Overview
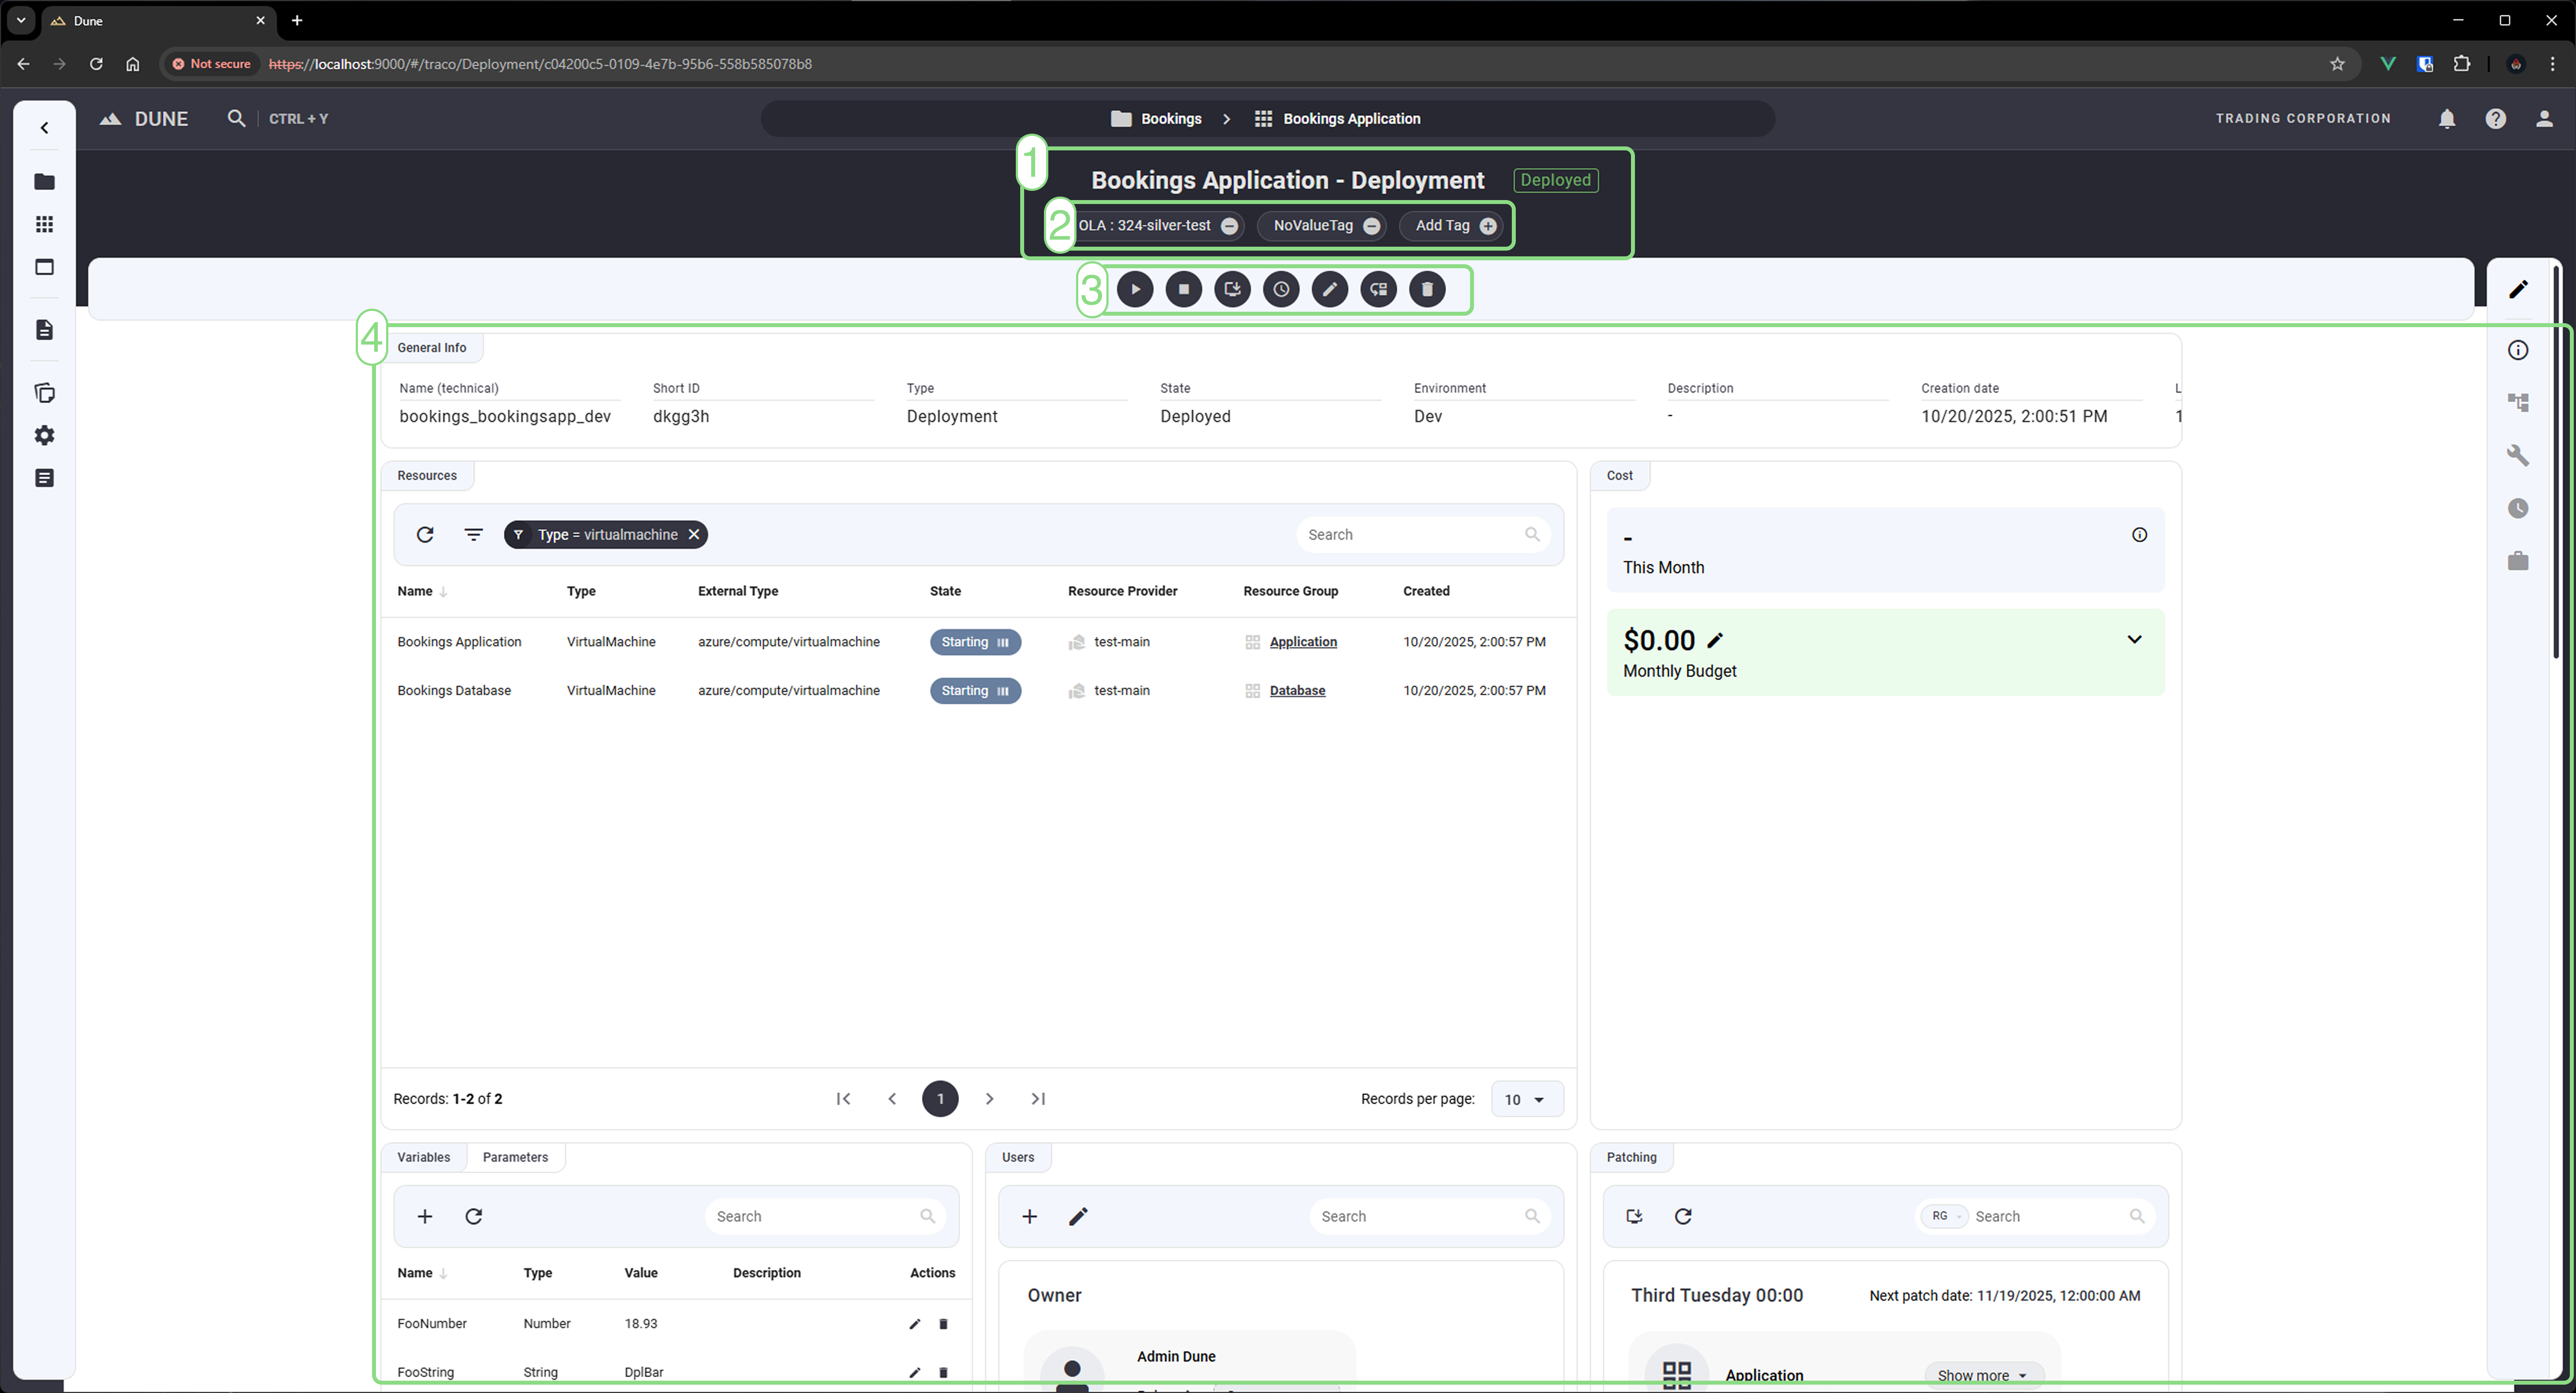
The Deployment View is composed of several key sections:
- Header – Displays the deployment name and its current state.
- Tags Section – Lets you view, add, or remove tags for your deployment. See Tagging for more details.
- Operations Bar – Contains operational controls such as start, stop, patch, and more. See Operations.
- Grid Layout – Displays deployment-specific widgets in a customizable grid. To learn more about navigating or editing the grid, refer to the Portal/Grid documentation.
Operations
The Action Bar provides the most common operations you’ll use to manage your deployment:

1. Start Deployment
Starts all underlying resources of the deployment. Resources start in the order defined in your Start Sequence configuration. See Set Start/Stop Sequence for details.
2. Stop Deployment
Stops all underlying resources of the deployment. The stop order follows your Start Sequence in reverse.
3. Restart Deployment
Restarts all underlying resources of the deployment.
4. Manage Patching
Opens the Patching Dialog, where you can assign a patch schedule to resource groups.
5. Manage Schedule
Allows you to define automated operations (such as Start and Stop) using cron expressions. See Set Schedules for more details.
6. Assign Action
Opens the Assign Action dialog, allowing you to attach predefined Action Templates directly to your deployment. See Assign Actions for more details.
7. Edit Deployment Info
Opens a dialog to edit basic information such as Display Name and Description.
8. Move Deployment
Lets you move the deployment to a different parent collection. You’ll see a preview of the new technical name before confirming the move.
9. Delete Deployment
Deletes the deployment and all of its children. To confirm, you’ll need to type the deployment’s display name before deletion.
Set Start/Stop Sequence
You can define a start/stop sequence that controls the order in which resources are started, stopped, or restarted. (Does not apply to patching)
How It Works
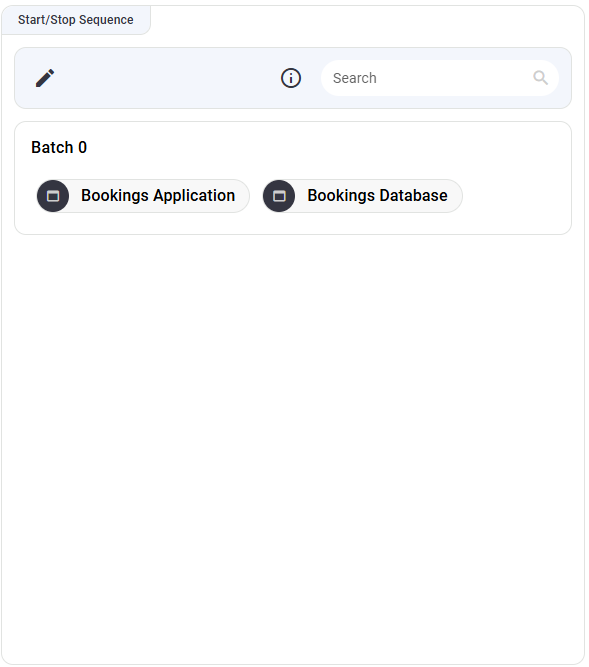
- Access this feature through the Start/Stop Sequence widget.
- By default, all compute nodes are placed in a single batch named Batch 0.
- Batches define execution order:
- Resources in the same batch run in parallel.
- Batches run sequentially.
- The Stop sequence runs in reverse order of the Start sequence.
- Sequences are applied at each start and stop of the deployment. So whenever start/stop gets triggered via the action bar or by a schedule.
Editing the Sequence
- Click the pen icon to switch to edit mode. The icon will change to a check icon.
- Drag and drop to move resources into new batches.
- Dragging a resource to the “New Batch” area automatically creates a batch.
- Reorder batches using the drag handle on the right.
- Optionally, set a delay for each batch to define waiting time between executions.
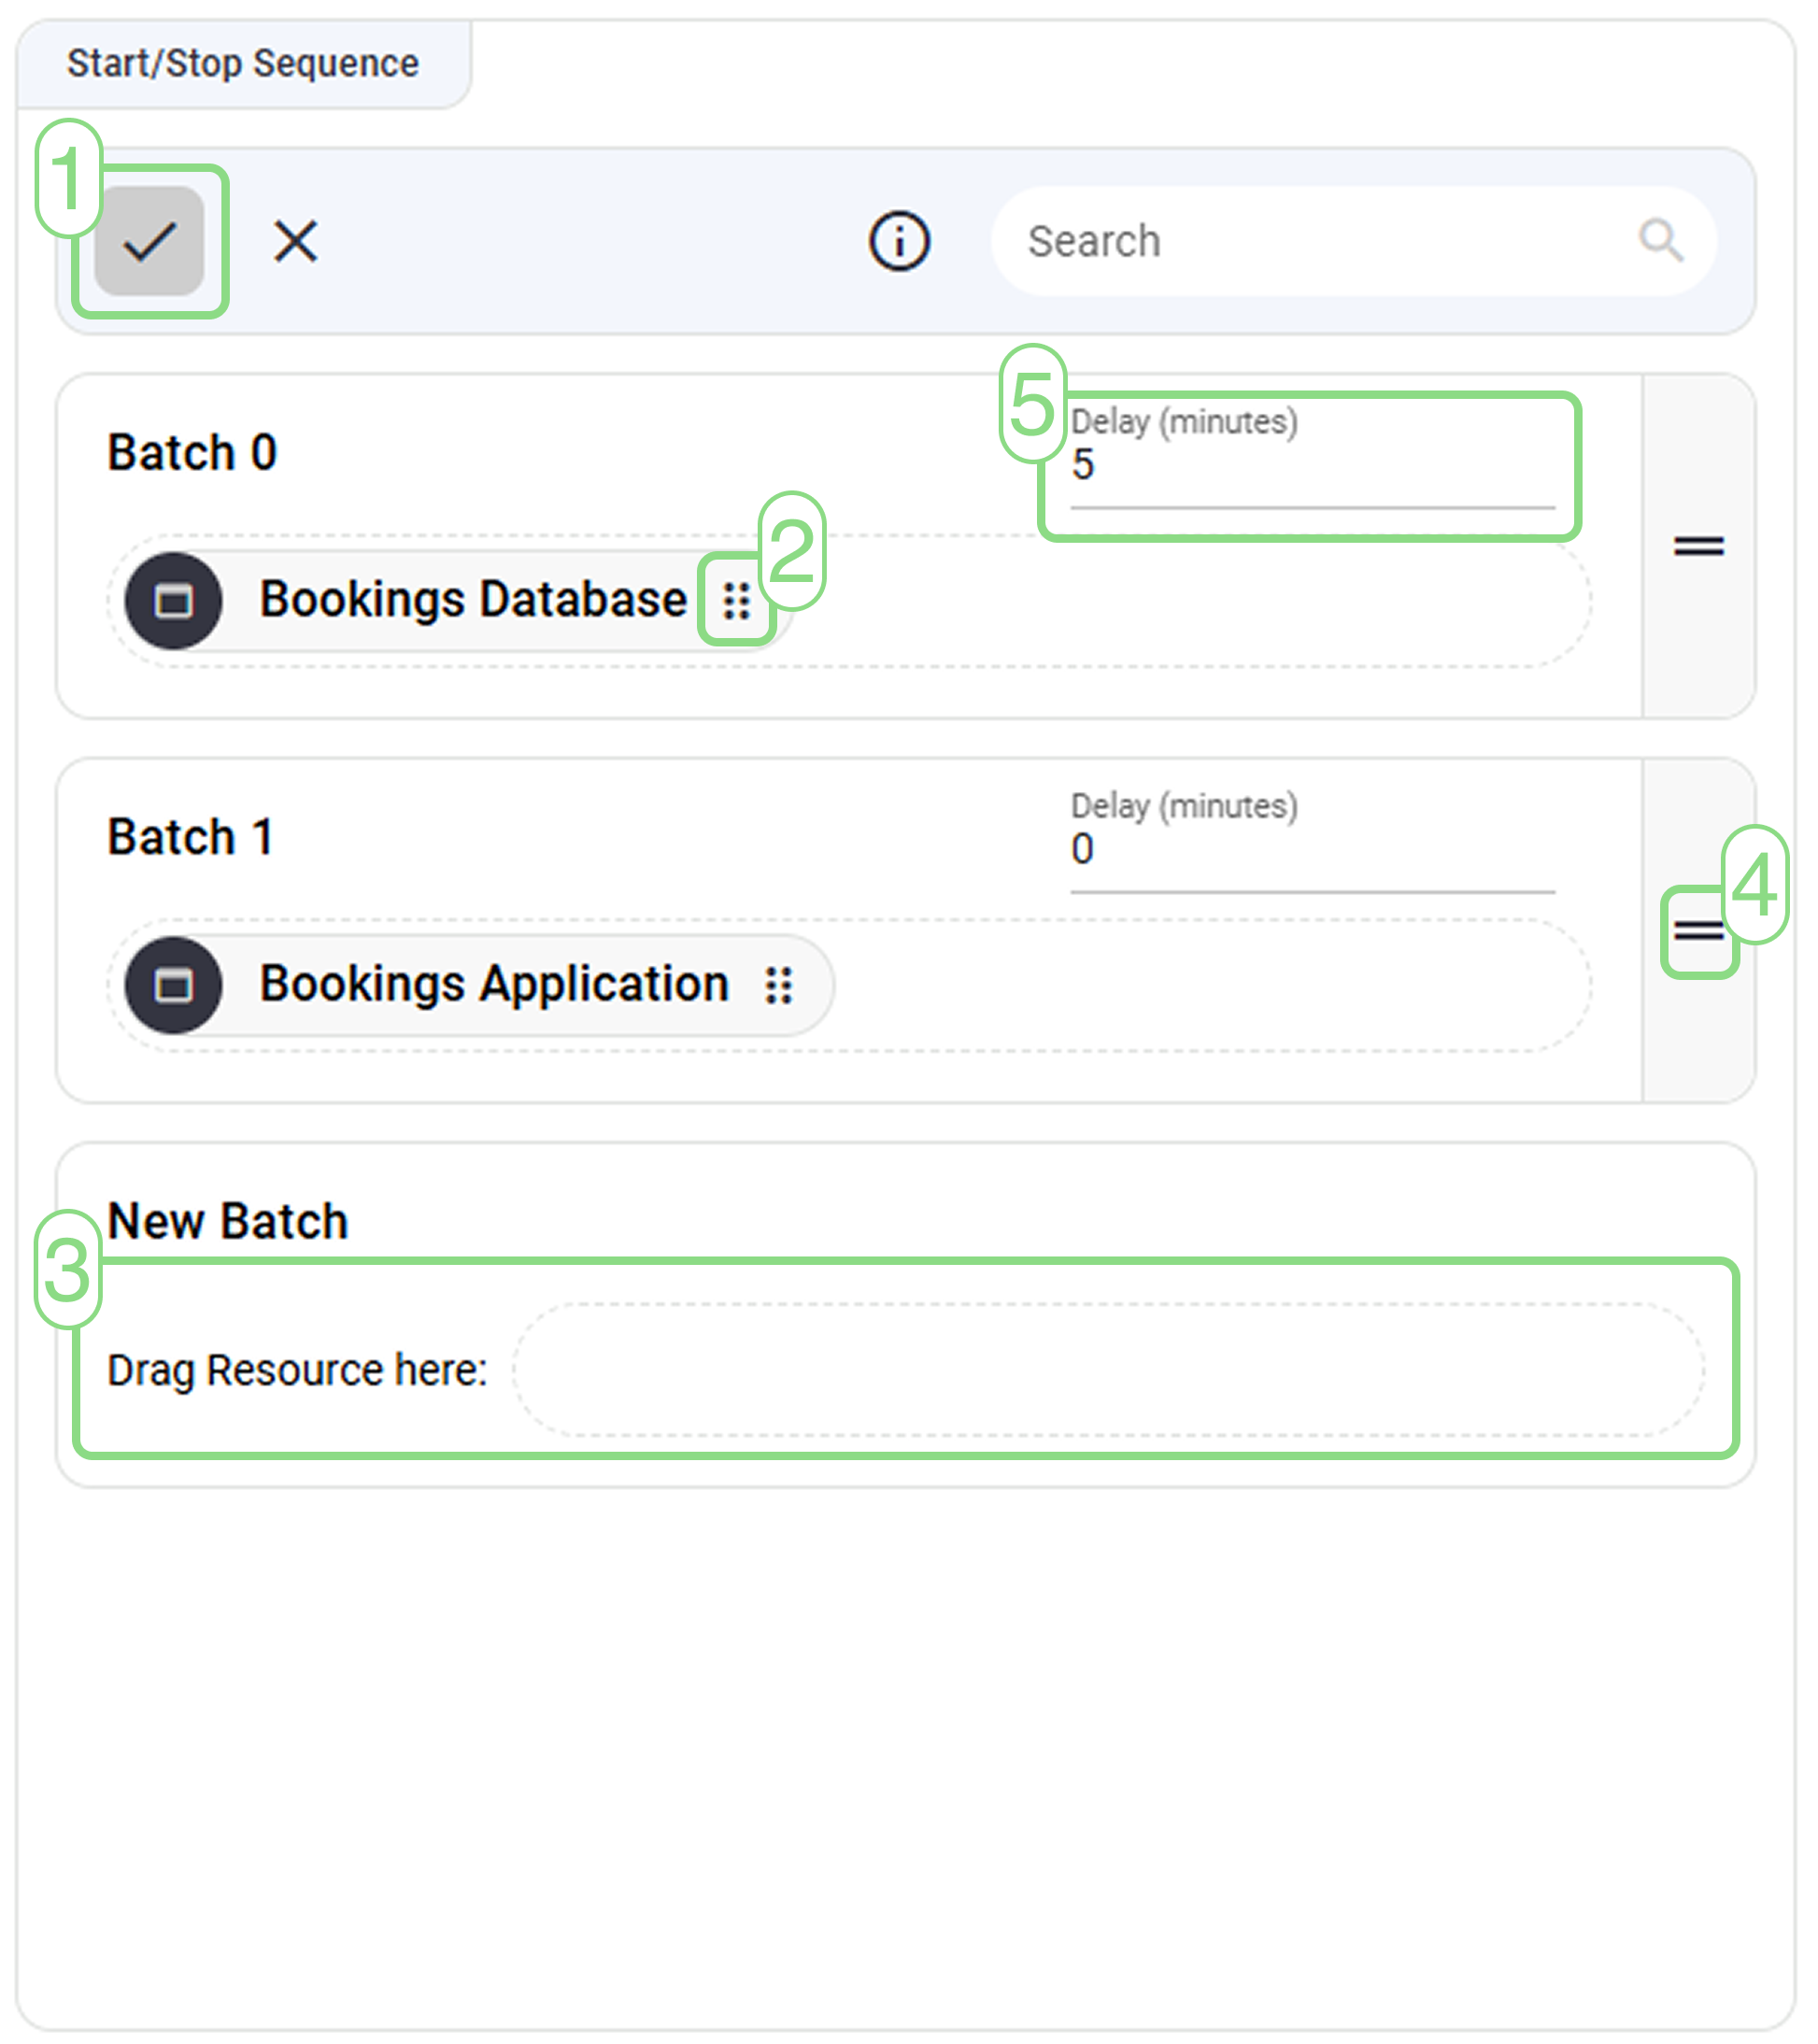
⚠️ Important: The delay gets executed after the operation for the current batch is done. Example -> Batch 0 with a database resource gets started. The delay will kick in for 5 min after the db resource has started and is running. Once the 5 minute delay is over the next batch will be executed.
Assign Actions
The Assigned Actions widget manages standalone workflows for your deployment.
- Assign actions via the operations bar or the widget's
+icon. - Provide a custom name and select from available Action Templates.
- You can execute (play icon), edit (pencil icon), or unassign (X icon) these actions directly from the table rows.
- Click a row to view the assignment parameters in a right-side splitter pane, or click the template name to view the underlying YAML definition and related assignments.
For more details about actions, refer to the Actions documentation.
Set Schedules
Schedules allow automated deployment operations (Start, Stop, Restart) and the execution of assigned Actions at specific times.
How to Set a Schedule
Open the Manage Schedule dialog from the Action Bar or the Schedules widget.
- Select either Operation or Action from the first dropdown.
- Select the specific operation or assigned action from the second dropdown. (Note: Actions must have their required parameters filled out prior to scheduling).
- Enable the schedule using the Enable Schedule checkbox.
- Enter a cron expression in the input field. A link to crontab.guru and an info icon are available for guidance.
- Review the human-readable summary and the “Next 3 Runs” preview. The cron expression is stored in UTC, but the preview displays in your Local Time.
- Click Save to assign the schedule to your deployment.
Viewing and Managing Schedules
- The Schedules widget displays a table of upcoming schedules sorted by the next run time.
- Click the Timeline icon in the action bar to open a right-side splitter pane visualizing the next two runs. Select specific rows to filter this timeline.
- Click Show Related Tasks to reveal schedules associated with child resource groups or virtual machines.
- To delete a schedule, click the bin icon in the Actions column and confirm the deletion. (Note: Patch Windows cannot be deleted from here and do not count toward table records).
For more details about schedules, refer to the Schedule documentation.
User Management
The Users widget lists all users assigned to the deployment by role.
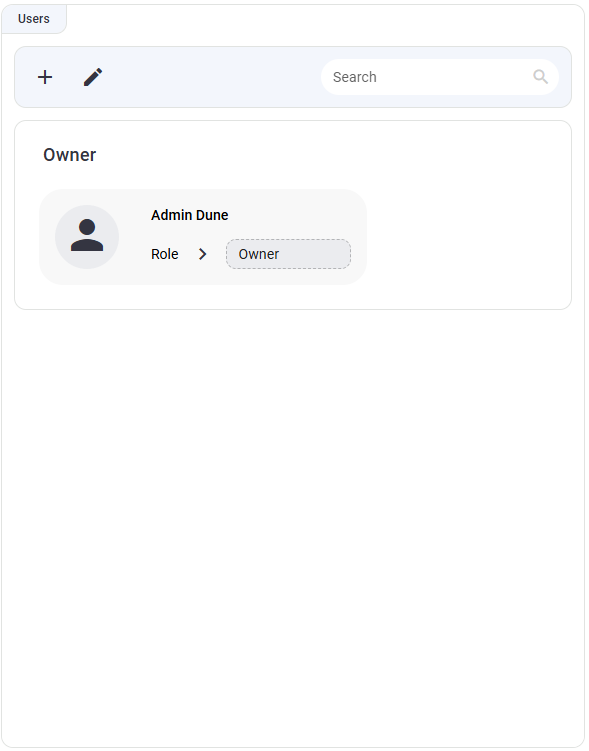
For more information, you can check out the Portal/Permissions(Owners) documentation page.
Patching
To view or manage patching information for your deployment and its underlying resources:
- Navigate to the Patching widget.
- From here, you can assign or modify patch schedules.
For detailed instructions, refer to the Patching documentation.
Cost Tracking
How are costs imported and calculated: Cloud Cost Import
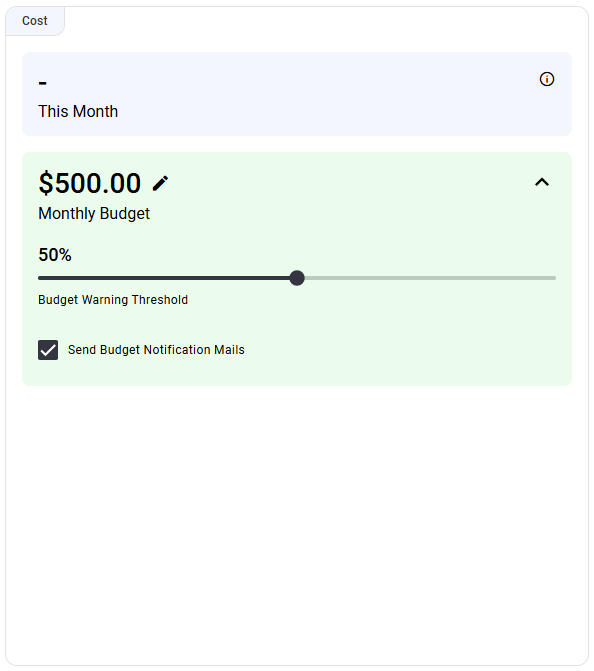
The Costs widget provides insights into monthly and historical costs.
Features
- View current and past monthly costs.
- Set a Monthly Budget by clicking the pen icon.
- Adjust the Budget Warning Threshold (in %) using the slider.
Notifications
- When costs exceed your threshold:
- A warning flag appears under the Action Bar.
- Optionally, enable email notifications for alerts.
Jobs
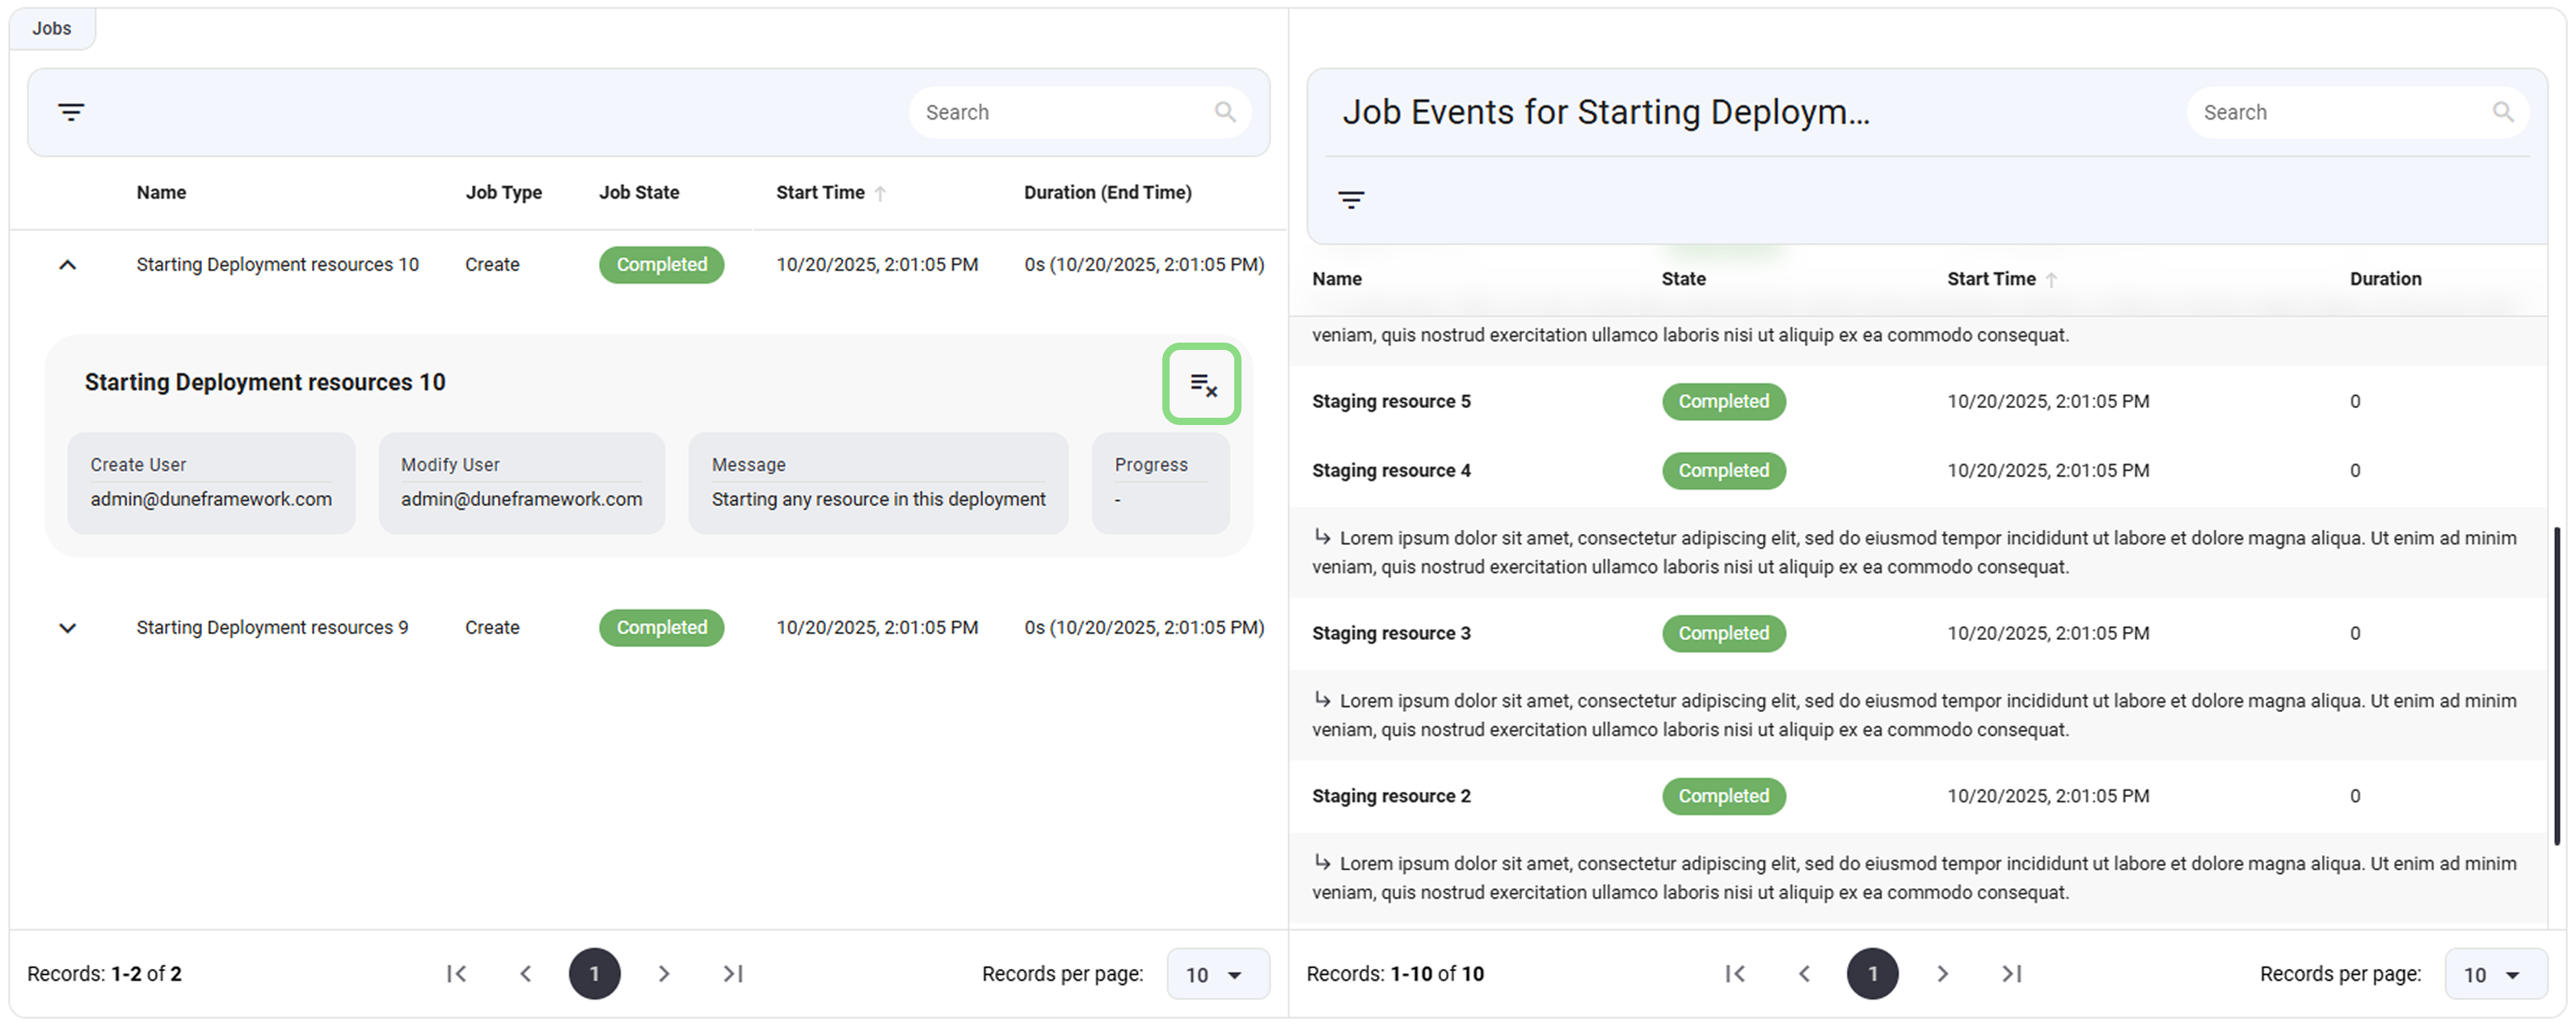
Most operations in Dune generate a Job, allowing you to track their progress.
Jobs Widget
- Displays a sortable table of jobs, driven by Server-Sent Events (SSE) for real-time updates. By default, it sorts by the latest start time.
- Click a job row to open the Job Details right-side splitter pane.
- The pane contains an EVENTS tab showing live execution progress and an INFO tab containing metadata and configuration details.
- Use the Show Related Jobs button to view jobs executing on child resources.
For detailed instructions, refer to the Jobs documentation.
Tagging
Tags allow you to categorize and identify deployments easily.

Adding Tags
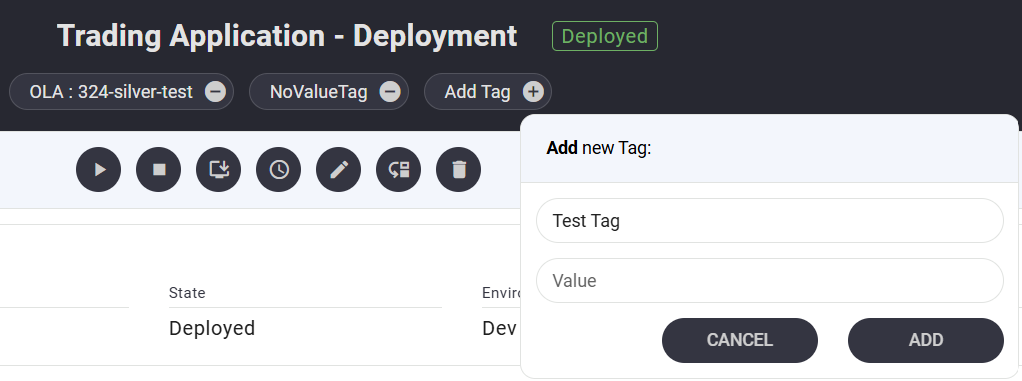
- Click the Plus icon of Add Tag chip below the deployment title.
- Enter a Key (required) and Value (optional).
- Click Add to create the tag.
- Tags are also synchronized with Azure.
Removing Tags
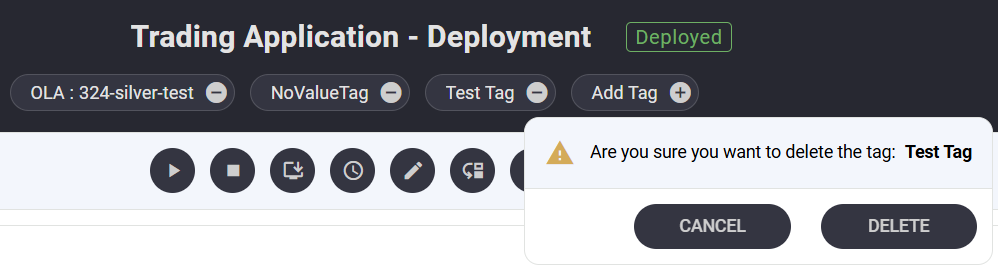
- Click the Minus icon next to a tag.
- Confirm deletion when prompted.